
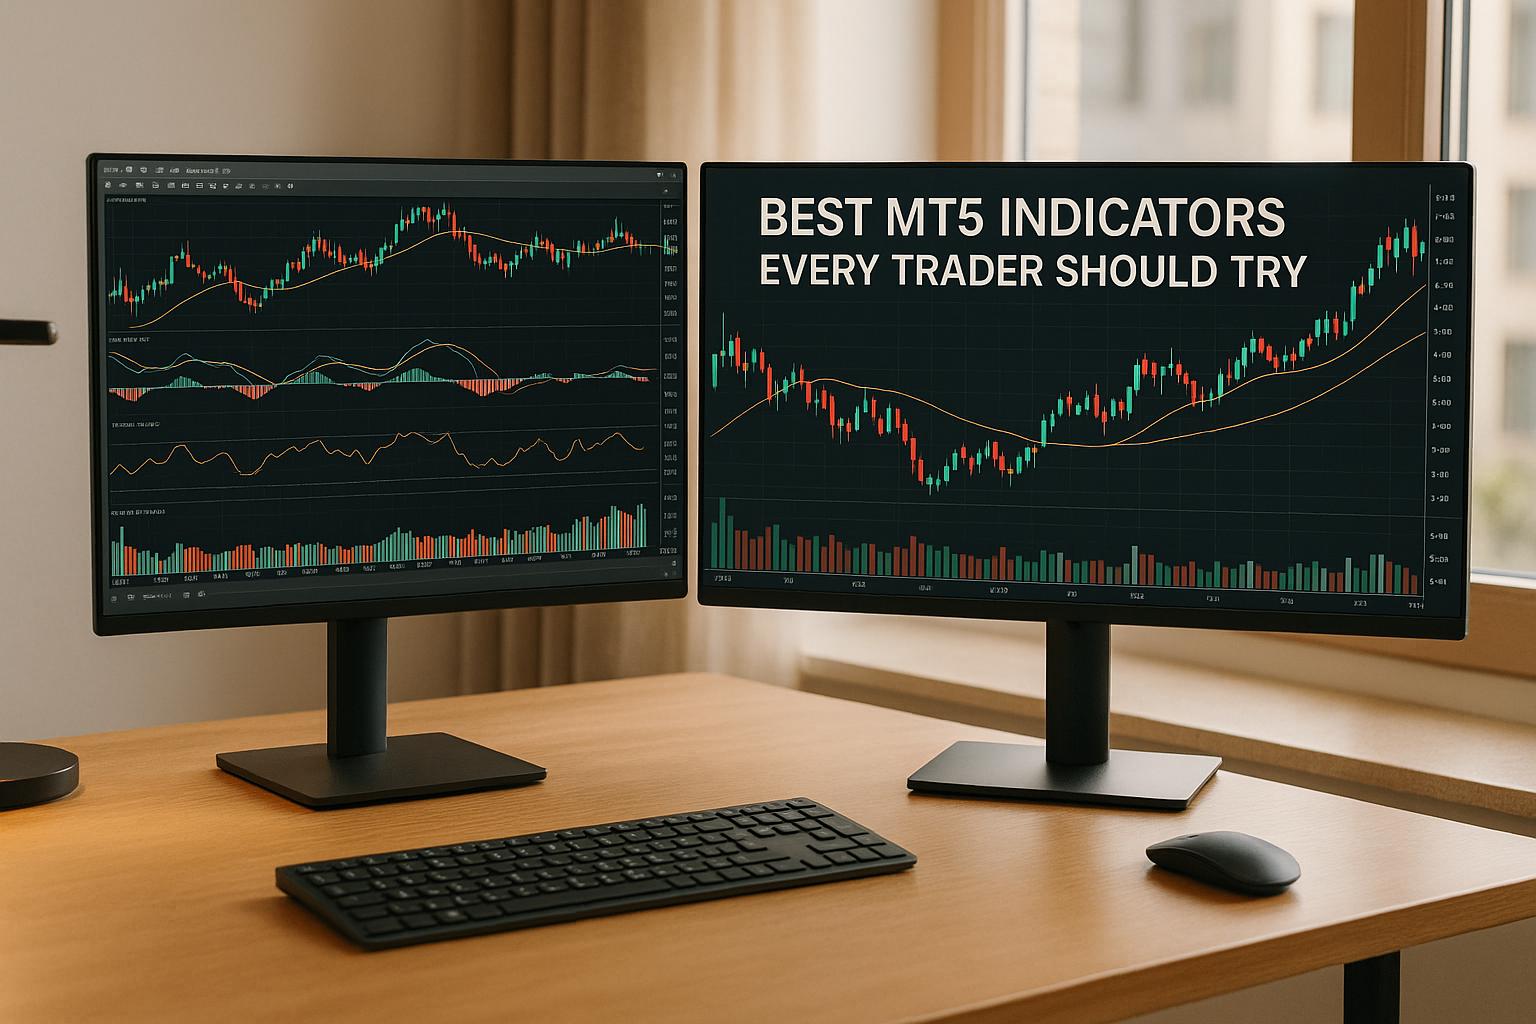
MetaTrader 5 (MT5) indicators transform raw market data into actionable insights, making them essential tools for traders. Whether you're trading funded accounts vs demo trading environments, these tools help identify trends, manage risk, and refine strategies. Here’s a quick look at the top MT5 indicators every trader should consider:
- Moving Averages (SMA & EMA): Highlight trends and act as support/resistance.
- Relative Strength Index (RSI): Spot overbought/oversold conditions and potential reversals.
- Bollinger Bands: Analyze volatility and detect price extremes.
- MACD (Moving Average Convergence Divergence): Combine trend and momentum analysis.
- Fibonacci Retracement: Identify support/resistance and reversal levels.
- Average True Range (ATR): Measure market volatility and guide position sizing.
- Stochastic Oscillator: Pinpoint momentum shifts in ranging markets.
- On-Balance Volume (OBV): Confirm price moves through volume trends.
- Ichimoku Cloud: Offer a full view of trends, momentum, and key levels.
- Custom Indicator Suite: Tailored tools for trends, breakouts, and reversals.
Each indicator serves a specific purpose, from spotting trends to managing risk. Some excel in trending markets, while others are better for range-bound or volatile conditions. By combining complementary tools, you can enhance your trading strategy and make more informed decisions. Let’s break down how these indicators work and where they perform best.
Top FIVE FOREX INDICATORS For MT4 and MT5 (MUST USE)!

1. Moving Averages (SMA and EMA)
In MT5, moving averages, including the Simple Moving Average (SMA) and Exponential Moving Average (EMA), help smooth out price fluctuations to highlight market trends. They also double as dynamic support and resistance levels. While the SMA calculates an average of prices over a specific period, the EMA gives more weight to recent prices, making it quicker to respond to market changes.
Primary Function
The core purpose of moving averages is to identify the overall market direction. Additionally, they can act as flexible support and resistance zones, adapting to price movements.
Best Market Conditions
Moving averages perform best in markets with a clear trend, helping traders follow the momentum.
Up next, we’ll dive into the Relative Strength Index (RSI) for deeper market analysis.
2. Relative Strength Index (RSI)
RSI, or Relative Strength Index, is a momentum oscillator that measures the speed and change of price movements on a scale from 0 to 100. It’s a handy tool for traders to spot when an asset might be overbought or oversold, helping them time their trades more effectively in different market conditions.
RSI works by comparing recent gains to recent losses over a standard 14-period timeframe. A reading above 70 suggests an asset is overbought, while a reading below 30 indicates it’s oversold.
Primary Function
RSI’s main job is to highlight potential price reversals. While its overbought and oversold signals are widely used, RSI also shines in detecting divergences between price and momentum. For example, if the price reaches a new high but RSI doesn’t follow, this bearish divergence often hints at a potential price drop. On the flip side, if the price hits new lows but RSI forms higher lows, this bullish divergence could signal an upcoming rally.
Best Market Conditions
RSI performs best in sideways or ranging markets where support and resistance levels are clearly defined. In these conditions, the 70 and 30 levels often act as reliable reversal points. However, in strongly trending markets, RSI can stay in overbought or oversold zones for prolonged periods, making its traditional signals less dependable.
Complexity Level
RSI is beginner-friendly. Its straightforward 0–100 scale and clear visual representation on platforms like MT5 make it easy for new traders to start using basic overbought and oversold signals right away.
Optimal Timeframes
RSI works well across multiple timeframes:
- Daily charts: Offer stronger and more reliable signals with fewer false alarms.
- 4-hour charts: Provide a balance between signal frequency and reliability.
- 1-hour and 15-minute charts: Generate more frequent signals but often require additional confirmation to avoid false positives.
The default 14-period setting is suitable for most situations, but some traders tweak it based on their strategies. For instance, a 21-period setting smooths out signals, while a 9-period setting increases sensitivity for volatile markets.
Once you’ve mastered RSI, tools like Bollinger Bands can complement your analysis by focusing on volatility-based price movements.
3. Bollinger Bands
Bollinger Bands are a popular tool for analyzing market volatility, using a moving average and two standard deviation lines to form a price channel. Traders rely on this indicator to identify when prices might be straying too far from their usual range, making it easier to spot potential reversals and gauge market volatility.
These bands are built around a 20-period moving average, with the width of the bands expanding during periods of high volatility and contracting when the market is calmer.
Primary Function
Bollinger Bands help traders assess volatility and detect overbought or oversold conditions. Acting as dynamic support and resistance levels, the bands adjust to market activity. When prices touch either band, it often signals an overextended move. A reversal after touching a band is referred to as a "Bollinger Bounce", while a "Band Squeeze" happens during low volatility, often signaling an impending breakout.
This indicator is also useful for spotting potential breakouts. Narrow bands suggest a buildup of tension, where sudden expansion often marks the beginning of a new trend. Conversely, extremely wide bands may indicate that the current trend is losing momentum.
Best Market Conditions
Bollinger Bands are particularly effective in sideways or ranging markets, where prices tend to oscillate predictably between the upper and lower bands. Traders can use these levels for well-timed entries and exits.
In trending markets, prices may "walk the bands", staying near the upper band during uptrends or the lower band during downtrends. This behavior signals strong momentum, rather than a reversal.
Complexity Level
Bollinger Bands are suitable for traders ranging from beginners to intermediates. While the basic idea of prices bouncing off the bands is easy to understand, fully mastering how to interpret squeezes, breakouts, and other nuances takes practice and experience.
Optimal Timeframes
This indicator adapts well across different timeframes, but its effectiveness depends on the trader's goals:
- Daily charts: These are ideal for reliable signals with fewer false breakouts. The standard 20-period setting works particularly well here.
- 4-hour charts: A good choice for swing traders, offering multiple signals per week while maintaining accuracy.
- 1-hour and 15-minute charts: These shorter timeframes provide more frequent signals but require confirmation to avoid being misled by market noise. Day traders often pair Bollinger Bands with volume indicators or momentum tools for added precision.
The default settings (20-period moving average and 2 standard deviations) are versatile across most timeframes. However, some traders tweak the period to 14 or 21 to better suit their specific strategies and market conditions.
Next, we’ll move from volatility analysis to momentum indicators, starting with MACD.
4. Moving Average Convergence Divergence (MACD)
The MACD is a powerful MT5 indicator that merges trend-following and momentum analysis. It uses three main components: the MACD line (calculated as the difference between the 12-period and 26-period EMAs), a 9-period EMA signal line, and a histogram. Together, these elements help traders identify trend direction and spot potential reversals. Its ability to track trends and detect momentum shifts before they show up on price charts makes it a go-to tool for many traders.
Primary Function
MACD generates signals in three key ways: signal line crossovers, zero-line crossovers, and divergence analysis. Signal line crossovers occur when the MACD line crosses the signal line, often indicating potential entry or exit points. Zero-line crossovers happen when the MACD line moves above or below the centerline, signaling a shift in momentum.
"The MACD is one of the most popular momentum indicators, as it provides a simple and effective way to identify the strength of a trend and potential reversal points." - John J. Murphy, Technical Analysis of the Financial Markets
The histogram adds another layer of insight by showing the strength of momentum. A widening histogram suggests growing momentum, while a narrowing one points to weakening momentum and possible trend changes. These features make MACD particularly effective in trending markets, where its signals align well with price movements.
Best Market Conditions
MACD shines in trending markets, where it helps confirm the direction and strength of the trend. During strong uptrends or downtrends, traders can rely on it to stay aligned with the prevailing trend and avoid exiting too early. For example, zero-line crossovers can be used as confirmation signals: buying when the MACD rises above zero in an uptrend or selling when it falls below zero in a downtrend.
Pairing MACD with longer-period EMAs, such as the 200-day EMA, can further validate the overall trend direction. However, in choppy or sideways markets, MACD's frequent crossovers can result in false signals, leading to potential whipsaw trades. During these conditions, traders should exercise caution and consider additional confirmation tools.
Complexity Level
MACD is ideal for intermediate traders who are comfortable with both trend and momentum analysis. The basic crossover signals are easy to understand, but using MACD effectively requires knowing when to act on signals and when to wait for further confirmation.
"One of the main advantages of the MACD is its ability to alert traders to the potential for a trend reversal before it becomes obvious." - Barbara Rockefeller, Technical Analysis: A Beginner's Guide
For more advanced strategies, comparing MACD movements with price action can reveal hidden momentum shifts. For instance, if prices hit new highs but the MACD fails to do the same, it may signal a weakening trend and a possible reversal.
Optimal Timeframes
MACD is versatile and works across various timeframes, but its effectiveness depends on the trader's style and market conditions:
- Daily charts: The standard settings (12, 26, 9) are great for swing trading signals.
- 4-hour charts: Offer a balance between signal frequency and reliability.
- Hourly and shorter timeframes: Require additional confirmation to filter out noise. Custom settings (e.g., 5, 35, 5) can make MACD more responsive for intraday trading.
In ranging markets, combining MACD with tools like RSI or Bollinger Bands can help reduce false signals and improve accuracy. A multi-timeframe approach - such as analyzing MACD on both daily and hourly charts - can provide a clearer picture for decision-making and trend validation.
Next up, we’ll explore an indicator that focuses on price retracements and identifies key support and resistance levels.
5. Fibonacci Retracement
Fibonacci retracement is a tool that helps traders pinpoint potential support and resistance levels by using natural mathematical ratios. It works by plotting horizontal lines at specific percentages - 23.6%, 38.2%, 50%, 61.8%, and 78.6% - between a major swing high and low on a price chart. These levels often highlight areas where prices might pause, reverse, or consolidate.
The concept is rooted in the idea that markets tend to retrace a predictable portion of a move before continuing in the original direction. Among these levels, 61.8% and 38.2% are often regarded as the most important, as they align with the "golden ratio" observed in nature and have shown consistent reliability in market analysis.
Primary Function
Fibonacci retracement is primarily used as a trend analysis tool, helping traders identify potential reversal points within ongoing trends. For example, in an uptrend, when prices pull back, the retracement levels can act as potential bounce zones where the upward movement might resume. Similarly, in a downtrend, these levels can indicate where temporary recoveries might end before the decline continues.
One of the tool's strengths lies in identifying areas of confluence - places where multiple technical factors align. For instance, if the 61.8% retracement level overlaps with a previous support zone or a round number like $50.00, the likelihood of a price reaction increases. Traders often use these levels to make disciplined decisions, such as placing stop-loss orders just beyond key retracement points or setting profit targets at Fibonacci extension levels.
Best Market Conditions
Fibonacci retracement works best in trending markets with well-defined swing highs and lows. It tends to lose effectiveness in choppy or news-driven markets, where price movements are erratic. To establish meaningful retracement levels, the initial price movement should be significant - typically at least a 10-15% move for stocks or 100-200 pips in major currency pairs.
Trending markets with occasional pullbacks offer the ideal conditions for Fibonacci retracement. In these scenarios, traders can draw levels from the start of a trend to its most recent peak or trough and monitor price reactions at key levels. The 38.2% level often acts as the first line of support or resistance, while the 61.8% level indicates deeper corrections that still align with the overall trend.
Complexity Level
Fibonacci retracement is well-suited for intermediate traders who are already comfortable with basic trend analysis and support/resistance concepts. While drawing the levels is straightforward - connecting a swing high to a swing low - interpreting the results requires experience and a solid understanding of market behavior.
One common challenge is selecting the correct swing points. Beginners might find themselves repeatedly adjusting the levels to account for minor price fluctuations. More experienced traders, however, focus on identifying the major swing points that reflect significant trend movements, avoiding the noise of smaller, less meaningful price changes.
For advanced users, Fibonacci retracement can be combined with other tools like moving averages, trendlines, or candlestick patterns for more robust analysis. Some traders also use multiple timeframe analysis, plotting Fibonacci levels on both daily and weekly charts to identify critical zones where multiple levels intersect.
Optimal Timeframes
Fibonacci retracement is versatile and can be used across various timeframes, but its reliability tends to improve with longer periods that capture significant price movements. Choosing the right timeframe is essential for effective trade planning.
- Daily and weekly charts are ideal for swing and position trading strategies. These timeframes often display clear trends and retracements that align closely with Fibonacci ratios, providing reliable levels for several days or weeks.
- 4-hour charts strike a balance between reliability and frequency of opportunities, making them a good choice for traders looking to capture intraday retracements in trending markets.
- Hourly and shorter timeframes can be used for scalping, but they come with greater risks. The increased market noise on these timeframes often leads to false signals, so traders should combine Fibonacci levels with other confirmation tools and focus on highly liquid markets during active trading hours.
Ultimately, the success of Fibonacci retracement depends on ensuring that the price movement used to draw the levels reflects a significant trend rather than random fluctuations.
6. Average True Range (ATR)
The Average True Range (ATR) is one of the most effective tools for analyzing price volatility on the MT5 platform. Unlike trend-following indicators that hint at price direction, ATR focuses purely on how much prices may fluctuate. This makes it a valuable resource for traders when it comes to managing risk and setting stop loss and take profit levels.
ATR calculates the average true range over a specific period (commonly 14). It uses the largest value among these three: the difference between the current high and low, the absolute difference between the current high and the previous close, and the absolute difference between the current low and the previous close. This approach ensures that price gaps are fully accounted for.
Primary Function
ATR is primarily used as a volatility measurement tool, giving traders critical insights into market behavior. Its strength lies in its ability to provide objective data, which can be applied to various aspects of trade management on MT5.
One of its key uses is in position sizing. For example, if the EUR/USD pair has an ATR reading of 80 pips on the daily chart, a trader might set their stop-loss at 120 pips (1.5 times the ATR). This approach helps avoid being stopped out by normal market fluctuations, ensuring consistent risk management.
ATR also aids in setting realistic profit targets. Traders often use 1–2 times the ATR for intraday trades or 3–5 times the ATR for swing trades. Additionally, when ATR readings contract below recent averages or spike, it can signal potential breakouts or pauses in trends.
Best Market Conditions
ATR proves useful in a variety of market environments:
- Trending markets: During strong trends, ATR readings tend to rise, helping traders adjust their stop-loss levels to give trades more breathing room. For instance, in major currency pairs like GBP/USD, ATR values may increase from 100 pips to 150 pips during a strong trend, reflecting heightened market momentum.
- Ranging markets: In periods of consolidation, ATR values often drop 20–30% below their recent averages. These lower readings can indicate that the market is "coiling", preparing for a breakout. Traders can use this information to size positions appropriately for mean-reversion strategies.
- High-impact news events: Major economic announcements often cause ATR readings to spike. Traders can use this data to adjust their approach, such as reducing position sizes or widening stop-loss levels to account for increased volatility.
Complexity Level
ATR is particularly appealing to beginner and intermediate traders because of its simplicity and practical applications. Unlike oscillators that require an understanding of overbought or oversold conditions, ATR provides straightforward numerical values that reflect volatility intensity.
- Beginner traders can use ATR for basic risk management by applying simple rules, such as setting stop-loss levels at 2 times the ATR. This offers a clear and actionable way to manage trades.
- Intermediate traders can take it a step further by incorporating ATR into more advanced strategies, such as dynamic trailing stops or combining it with directional indicators like moving averages or MACD for a more comprehensive trading system.
Optimal Timeframes
The effectiveness of ATR readings varies depending on the timeframe:
- Daily charts are ideal for most trading strategies, as the 14-day ATR smooths out intraday noise while providing a reliable view of recent volatility. For major currency pairs, daily ATR values between 80–120 pips are considered normal, while readings above 150 pips often suggest heightened market activity.
- 4-hour charts offer a good balance for active day traders, providing timely insights into volatility shifts during a trading session.
- Hourly and shorter timeframes can be useful for scalping, though ATR readings at these intervals tend to be less stable. They can still guide position sizing for very short-term trades in active markets.
- Weekly ATR readings are valuable for understanding long-term volatility trends. These are particularly helpful for position traders or those managing larger accounts, as they provide a broader perspective on market conditions.
7. Stochastic Oscillator
The Stochastic Oscillator is one of the go-to momentum indicators on MT5, particularly useful for spotting overbought and oversold conditions in the market. By comparing a security's closing price to its price range over a set period - typically 14 periods - it helps traders identify potential momentum reversals. It pairs well with tools like RSI and MACD, offering additional clarity on market shifts.
This indicator consists of two key lines: %K (the fast line) and %D (a 3-period moving average of %K). These values oscillate between 0 and 100. Generally, readings above 80 signal overbought conditions, while readings below 20 indicate oversold levels.
Primary Function
The Stochastic Oscillator is designed to analyze momentum reversals, often highlighting them before actual price movements confirm the trend shift. Pay close attention to crossovers in extreme zones - when %K crosses above 20, it may signal a buy opportunity, while a crossover below 80 could indicate a sell.
Another powerful feature of this tool is its ability to detect divergences. For instance, if the price of EUR/USD hits a new high of 1.1200, but the Stochastic only rises to 75 compared to a previous reading of 85, this bearish divergence suggests a weakening trend and a potential reversal.
Best Market Conditions
The Stochastic Oscillator thrives in ranging markets, where prices fluctuate between defined support and resistance levels. In these conditions, extreme readings - above 80 near resistance or below 20 near support - often signal reversals. For example, traders using the Stochastic on GBP/USD within a 150-pip range can pinpoint high-probability entry points near these boundaries.
However, in trending markets, the oscillator's extreme readings can persist for extended periods. During strong uptrends, overbought levels (above 80) might not immediately lead to a reversal, and the same applies to oversold levels (below 20) in strong downtrends. In such cases, wait for clear exhaustion signals before acting.
Complexity Level
The straightforward nature of the Stochastic Oscillator makes it an excellent starting point for traders exploring momentum strategies. Its range-bound design (0-100) simplifies interpretation compared to unbounded oscillators.
- For beginners, simple crossover strategies work well. For instance, a buy signal occurs when both %K and %D cross above 20, exiting oversold territory, while a sell signal appears when they cross below 80, leaving overbought levels.
- For intermediate traders, combining the Stochastic with trend-following tools like a 50-period moving average can refine strategy. For example, only taking buy signals when the price is above the moving average helps align trades with the overall trend.
Optimal Timeframes
The Stochastic Oscillator adapts well to various timeframes, depending on your trading style:
- Daily charts are ideal for swing traders, offering reliable signals that capture meaningful momentum shifts while filtering out short-term noise.
- 4-hour charts strike a balance for active day traders, delivering frequent signals with higher reliability than hourly charts. These work particularly well during the London and New York sessions when trading activity peaks.
- Hourly charts produce more signals but require additional confirmation to weed out false positives.
- Weekly charts are best for position traders, providing long-term insights that can guide trades lasting several months.
8. On-Balance Volume (OBV)
On-Balance Volume (OBV) is one of the go-to tools in the MT5 platform for traders looking to combine price action with volume analysis. Unlike indicators that rely solely on price, OBV calculates cumulative volume by adding the volume on up days and subtracting it on down days. This running total helps identify whether money is flowing into or out of a security, providing insights into potential price movements.
When OBV aligns with price trends, it strengthens the case for the trend's continuation. On the other hand, if prices rise but OBV fails to keep up, it could signal weakening momentum and a possible reversal. This makes OBV a valuable tool for analyzing volume dynamics alongside price.
Primary Function
The main purpose of OBV is to gauge buying and selling pressure by correlating volume with price direction. It can reveal hidden accumulation or distribution that might not be obvious from price alone. For instance, if a stock’s price stays flat while OBV steadily declines, it could indicate underlying selling pressure that hasn’t yet impacted the price.
One of OBV’s standout features is its ability to detect divergences. A bullish divergence occurs when the price makes lower lows, but OBV forms higher lows, hinting at accumulation. Conversely, a bearish divergence arises when the price hits new highs, but OBV fails to confirm the move, suggesting distribution might be taking place.
Best Market Conditions
OBV shines in trending markets, where consistent buying or selling pressure drives clear price movements. For example, when OBV rises alongside increasing prices, it reinforces the strength of the trend. During breakouts, a surge in OBV can confirm genuine buying interest, adding confidence to the breakout's validity.
However, in sideways or choppy markets, OBV can be less reliable. Inconsistent volume flows during these periods may lead to false signals, making it harder to interpret the indicator accurately.
Complexity Level
OBV is one of the most user-friendly volume indicators, making it suitable for traders at all experience levels. Its simplicity in calculation and visual representation allows beginners to quickly grasp its insights. For instance, if OBV moves in sync with price, it often signals trend continuation. A rising price with falling OBV, however, might signal caution.
Intermediate traders can take OBV analysis a step further by studying divergences over extended periods. Combining OBV with support and resistance levels can also enhance its effectiveness, providing a more comprehensive view of market conditions.
Optimal Timeframes
OBV’s reliability improves on higher timeframes, where market noise is minimized. For example, daily charts are excellent for spotting OBV divergences over weeks, while weekly and monthly charts can help identify major shifts in trends for longer-term strategies.
For short-term traders, OBV can be applied to hourly or 15-minute charts to time entries and exits. However, Forex traders should be cautious on lower timeframes since MT5 uses tick volume instead of actual trade volume, which can sometimes produce misleading signals. On higher timeframes like 4-hour or daily charts, the aggregated data helps mitigate this issue, offering a clearer picture of liquidity flow.
9. Ichimoku Cloud
The Ichimoku Cloud, like other key indicators in MT5, offers a unique way to analyze trends through its distinct visual elements. This tool is designed to provide a comprehensive overview of market trends, support, resistance, and momentum. It consists of five main components: the conversion line (Tenkan-sen), base line (Kijun-sen), cloud lines (Senkou Span A and B), and the lagging span (Chikou Span). Together, these elements give traders a quick snapshot of market conditions.
When the price moves above the cloud, it typically signals an uptrend, while trading below the cloud suggests a downtrend. The cloud itself acts as a dynamic support or resistance area, and its forward projection (26 periods ahead) helps highlight critical levels that may influence future price movements.
Primary Function
The Ichimoku Cloud combines multiple data points into a single indicator, making it a powerful tool for identifying trends, momentum shifts, and key support/resistance zones. For instance, a bullish signal might occur when the Tenkan-sen crosses above the Kijun-sen and the price moves above the cloud. On the other hand, bearish signals often arise when the opposite happens - Tenkan-sen crossing below Kijun-sen and the price dropping under the cloud. The Chikou Span serves as a confirmation tool, helping traders validate these signals.
Best Market Conditions
This indicator shines in trending markets, where its components align to deliver clear and actionable signals. During strong uptrends, the cloud provides reliable support, while in downtrends, it acts as resistance. However, in sideways or range-bound markets, its signals can be less dependable. Even so, the cloud can still help identify potential breakout levels. Volatile markets with a clear directional bias are particularly well-suited for the Ichimoku Cloud.
Complexity Level
The Ichimoku Cloud is a sophisticated tool, which can make it intimidating for beginners. For those just starting out, focusing on basic signals - like trading above the cloud for long positions and below for shorts - can simplify its use. Intermediate traders often explore crossovers and cloud dynamics, while advanced users may adjust the indicator settings to better fit their trading strategies and specific market conditions.
Optimal Timeframes
This indicator works best on daily and weekly charts, where market noise is reduced, making it a favorite for swing traders. It can also be effective on hourly charts, particularly in fast-paced Forex markets. Many traders adopt a multiple timeframe approach - using the weekly chart to gauge the broader trend and the daily chart to pinpoint entry and exit opportunities.
10. For Traders' Custom Indicator Suite

For Traders has crafted a specialized suite of MT5 indicators designed to meet the demands of simulated and proprietary trading. These tools go beyond standard indicators, offering features specifically aimed at helping traders navigate the challenges of virtual capital accounts and strict risk management protocols.
One standout feature is the use of non-repainting signals, which ensures that the indicators remain consistent whether you're backtesting strategies or trading live.
Primary Function
The Custom Indicator Suite is built to analyze market trends, volatility, and volume. Here's a quick breakdown of its key components:
- Trend Following Indicator: Provides clear signals to identify market direction.
- Spike Detector Indicator: Pinpoints sudden shifts in volatility.
- Dynamic Swing Trading Channel: Adapts stop-loss and take-profit levels to current market conditions.
- Volume-Based Tools: Confirms the strength of price movements to help reduce false breakout risks.
- Breakout Indicator with Arrows: Offers visual cues when prices break through critical levels.
- Lucky Reversal Indicator: Identifies high-probability points where the market is likely to reverse.
Additionally, the Renko Chart Indicator simplifies price action into "bricks", helping traders filter out market noise - an especially useful feature in volatile or choppy conditions.
Best Market Conditions
Each tool in the suite shines under specific market conditions:
- Trending Markets: The Trend Following Indicator and Dynamic Swing Trading Channel are ideal for capturing sustained market moves.
- Ranging or Consolidating Markets: The Lucky Reversal Indicator and Breakout Indicator with Arrows are perfect for identifying reversals or breakouts in these environments.
- Volatile Markets: The Renko Chart Indicator is particularly effective in cutting through the noise of unpredictable price action.
By matching the right tool to the current market environment, traders can better position themselves for success.
Complexity Level
This suite caters to a wide range of trading experience:
- Beginners: The Trend Following Indicator uses simple, color-coded signals, making it easy to understand.
- Intermediate Traders: Tools like the Dynamic Swing Trading Channel require a bit more skill, as they involve setting adaptive levels.
- Advanced Users: The Renko Chart Indicator demands a deeper understanding of non-standard charting techniques and is often favored by seasoned traders in competitive proprietary trading settings.
Optimal Timeframes
The effectiveness of these tools also depends on the timeframe you’re trading:
- 1-Hour, 4-Hour, or Daily Charts: Perfect for trend-following and swing trading, as these longer timeframes minimize market noise.
- 5-Minute and 15-Minute Charts: Best for short-term trades using the Spike and Breakout indicators. However, traders using these shorter timeframes should prioritize strong risk management to stay within the daily loss limits common in proprietary trading challenges.
This suite’s flexibility allows traders to adapt their strategies to various market conditions while maintaining disciplined risk management practices.
Quick Reference Table
Here’s a handy table summarizing the key MT5 indicators. It helps you align each tool with your trading style, experience level, and market conditions. Use this as a quick guide to reinforce the detailed strategies covered earlier.
| Indicator | Primary Function | Best Market Conditions | Difficulty Level | Optimal Timeframes |
|---|---|---|---|---|
| Simple Moving Average (SMA) | Identifies trends and support/resistance | Trending markets | Beginner | 1H, 4H, Daily |
| Exponential Moving Average (EMA) | Tracks trends with faster responsiveness | Strong trending markets | Beginner | 15M, 1H, 4H |
| Relative Strength Index (RSI) | Measures momentum and overbought/oversold levels | All market conditions | Beginner | 15M, 1H, 4H |
| Bollinger Bands | Highlights volatility and price extremes | High volatility and ranging markets | Intermediate | 5M, 15M, 1H |
| MACD | Detects trend changes and momentum shifts | Trending and transitional markets | Intermediate | 1H, 4H, Daily |
| Fibonacci Retracement | Identifies support/resistance and reversal levels | Trending markets with pullbacks | Intermediate | 1H, 4H, Daily |
| Average True Range (ATR) | Measures volatility and aids position sizing | All market conditions | Intermediate | 1H, 4H, Daily |
| Stochastic Oscillator | Signals momentum and potential reversals | Ranging or overbought/oversold markets | Intermediate | 15M, 1H, 4H |
| On-Balance Volume (OBV) | Confirms price moves through volume analysis | Trending markets | Intermediate | 1H, 4H, Daily |
| Ichimoku Cloud | Provides comprehensive trend analysis | Strong trending markets | Advanced | 4H, Daily, Weekly |
| For Traders' Custom Suite | Multi-purpose tool for trends, volatility, and breakouts | All market conditions | Beginner to Advanced | 5M to Daily |
This table highlights the core details of each indicator, making it easier to pair tools for specific strategies. For example, combining Moving Averages with RSI is a great way to blend trend identification with momentum confirmation. A typical scenario: if the price stays above a 50-period EMA and RSI dips below 30 (oversold) before heading upward, it often signals a strong continuation opportunity in an uptrend.
For traders navigating volatile markets, the MACD and Bollinger Bands pairing is particularly effective. When Bollinger Bands contract (indicating low volatility), a breakout is often imminent. If the price breaks above the upper band with a strong bullish candle and MACD crosses above its signal line, it confirms bullish momentum, signaling a potential buy entry.
The difficulty levels provide a sense of how much experience is needed to use each tool effectively. Beginner-friendly indicators like Moving Averages and RSI are straightforward, offering clear signals that are easy to interpret. On the other hand, advanced tools like the Ichimoku Cloud require a deeper understanding of their multiple components, making them better suited for seasoned traders.
Timeframes also play a critical role in indicator performance. Shorter timeframes (such as 5-minute or 15-minute charts) work well with momentum oscillators and breakout tools. Meanwhile, longer timeframes (like 4-hour or daily charts) are ideal for trend-following indicators. The For Traders' Custom Suite is particularly versatile, adjusting seamlessly to scalping and swing trading strategies across various timeframes.
To maximize your analysis, pair complementary indicators. For instance, combining a trend tool with a momentum oscillator offers a well-rounded view of market conditions, keeping your approach both focused and actionable.
Conclusion
MT5 indicators play a key role in turning raw market data into practical insights. Whether it’s the straightforward approach of Moving Averages or the in-depth analysis offered by the Ichimoku Cloud, each tool brings a distinct perspective to market analysis, helping traders make more informed decisions.
These indicators work seamlessly across different trading styles and timeframes - whether you’re scalping on 5-minute charts or swing trading on daily charts. This flexibility allows traders to adapt their strategies to suit various market conditions. Combining multiple indicators can enhance precision. For instance, pairing Moving Averages with RSI or using MACD alongside Bollinger Bands can create a solid system that performs well in diverse market environments.
On the For Traders platform, these tools shine in simulated trading challenges. They allow you to fine-tune your strategies using virtual accounts, with the added incentive of bi-weekly payouts once you hit a 9% profit target. Additionally, For Traders offers 12+ video courses to help you master these indicators, from basic tools like Moving Averages to advanced ones like the Ichimoku Cloud, all while emphasizing risk management.
Start with foundational indicators like Moving Averages and RSI to build your skills, and then expand to more advanced tools such as MACD and ATR as your trading approach develops. The Quick Reference Table is a handy guide for selecting indicators based on your experience level and market preferences, tying back to the strategies outlined earlier.
It’s important to remember that no single indicator is flawless. Success lies in understanding the market context, sticking to sound risk management, and applying well-tested strategies. Use these MT5 indicators as part of a complete trading plan that includes defined entry and exit rules, position sizing, and disciplined execution.
Finally, trading success is a journey of constant learning and practice. Keep testing, analyzing, and refining your methods to achieve your financial goals.
FAQs
What are the best ways to combine MT5 indicators for a stronger trading strategy?
Combining MT5 indicators can provide a clearer picture of market trends and help you make better trading decisions. Pairing tools like Moving Averages with RSI or MACD is a great way to confirm trends, spot potential reversals, and minimize false signals.
Here are a couple of examples:
- Moving Average + Stochastic Oscillator: Moving Averages help you identify the overall trend, while the Stochastic Oscillator pinpoints overbought or oversold conditions, giving you a more complete view of the market.
- MACD + RSI: The MACD shows trend direction and momentum, and the RSI highlights potential reversal points, making this duo particularly powerful for timing entries and exits.
Try experimenting with these combinations and tweak the settings to align with your trading preferences and the specific market conditions you're working with.
What’s the best way to choose the right timeframe for MT5 indicators?
Choosing the right timeframe for your MT5 indicators largely depends on your trading style and what you aim to achieve. If you're into day trading, shorter timeframes like 15-minute or 30-minute charts work well for spotting quick price changes. For swing traders, though, 4-hour or daily charts strike a better balance, offering enough detail while still capturing broader trends.
Multi-timeframe analysis can take your decision-making to the next level. By blending smaller, medium, and larger timeframes - say 15 minutes, 1 hour, and 4 hours - you get a more complete picture of market conditions. Many traders also swear by the daily timeframe because it often features higher trading volume and delivers more consistent signals.
Take the time to experiment with various timeframes and mix indicators across them. This will help you fine-tune a setup that matches your trading strategy.
When should I use the Ichimoku Cloud instead of simpler tools like Moving Averages?
Choosing between the Ichimoku Cloud and Moving Averages largely depends on what you're looking to achieve and how comfortable you are with technical analysis.
Moving Averages are great for identifying trends and pinpointing areas of dynamic support and resistance. They’re simple to understand and use, making them a popular choice, especially for beginners. However, they tend to lag behind during sudden market shifts, which can be a drawback in fast-moving conditions.
The Ichimoku Cloud, meanwhile, offers a more detailed picture by combining trend analysis, momentum, and support/resistance into a single tool. While it can provide richer insights, its complexity means it takes more time and effort to fully grasp.
If you’re aiming for a well-rounded approach, you might want to use both tools together. This combination can give you a broader perspective and help you make more informed trading decisions.
Related Blog Posts
Start Trading with For Traders
Join our platform to test your trading skills, trade virtual capital, and earn real profits. Access educational resources, advanced tools, and a supportive community to enhance your trading journey.
Start your Trading Challenge