False Breakouts: Why They Happen and How to Trade Them
False breakout statistics for 2026: 50-70% of intraday breakouts fail, 40-45% on daily charts. Failure rates by timeframe, asset, session, plus an ES/NQ backtest.
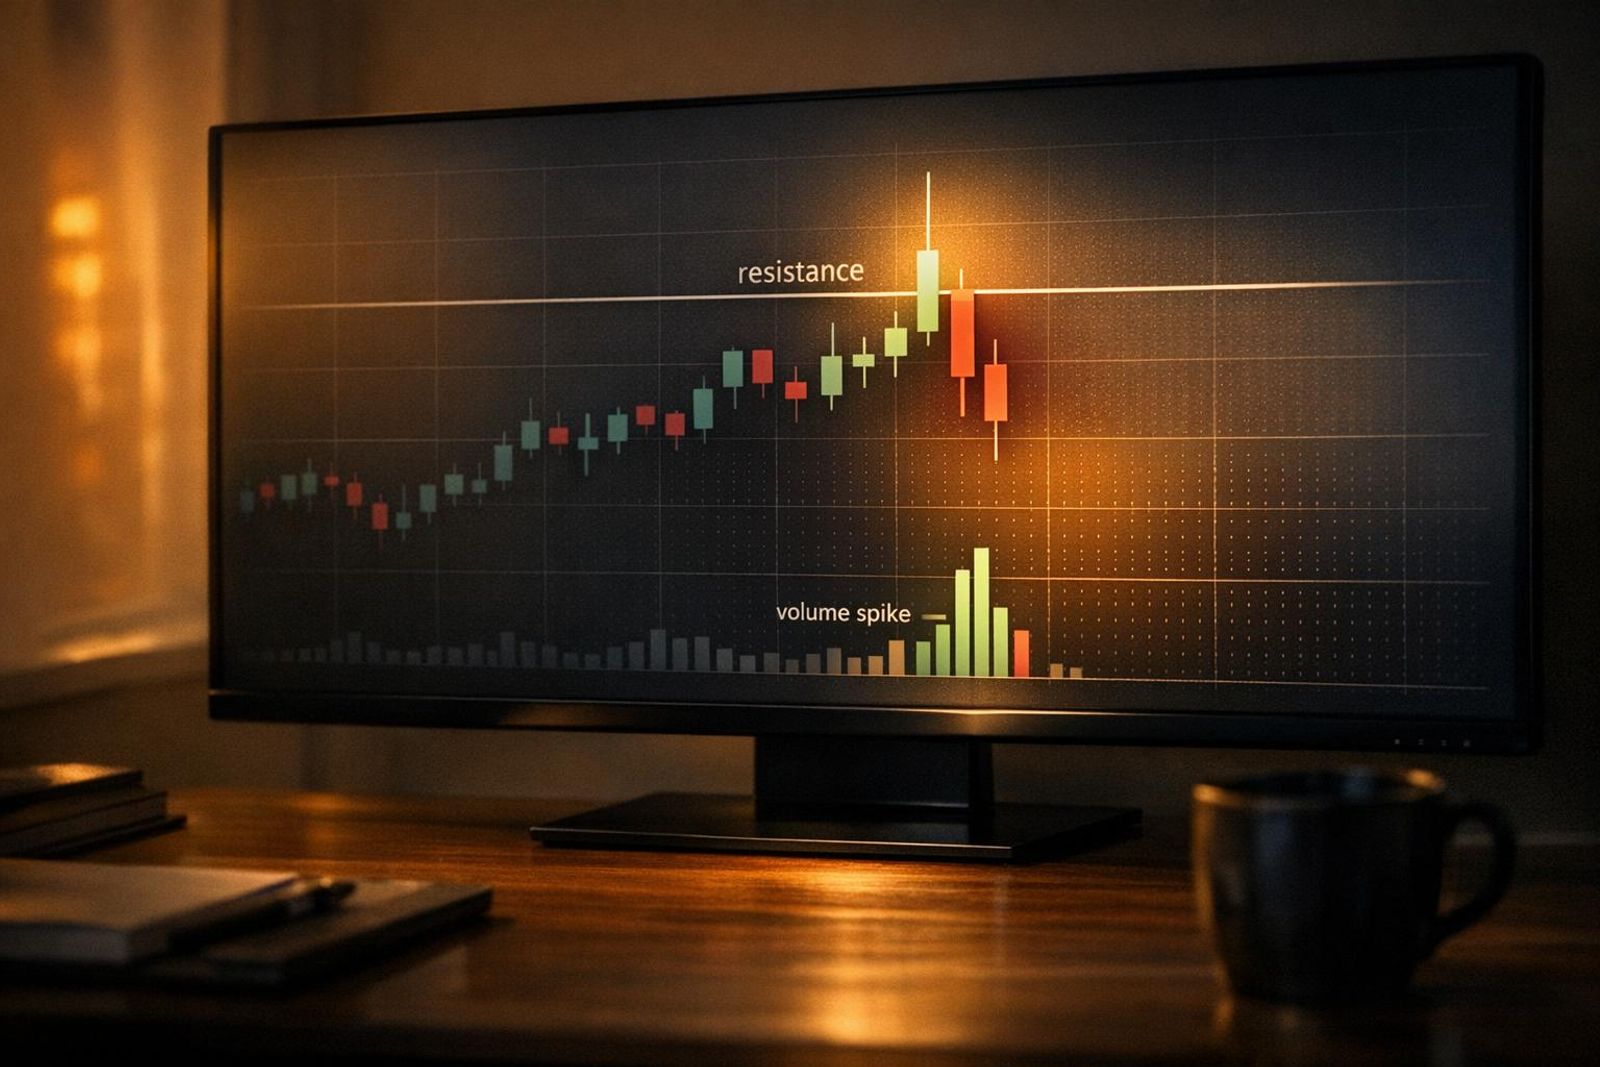
By Marcel Hambálek · Senior Trader, For Traders
Between 50% and 70% of intraday breakouts fail, meaning price closes back inside the prior 20-bar range within five bars of the break. Failure rates fall as timeframe rises: roughly 68-72% on 1-minute charts, 60-65% on 5-minute, 55-60% on 15-minute, near 50% on hourly and 40-45% on daily charts.
Key takeaways
- The widely quoted "70% of breakouts fail" figure is incomplete rather than wrong — it describes low-timeframe intraday behaviour, not daily charts, where failure drops to 40-45%.
- Failure rate scales inversely with timeframe: 1-minute breaks fail 68-72% of the time, daily breaks 40-45%, using a close-back-inside-the-range definition with a five-bar re-entry window.
- XAUUSD fakes out more than most instruments (~62% intraday) versus US100/NQ at ~54% and EURUSD at ~58%; BTC futures on CME sit highest at ~65%.
- Volume is the single most reliable real-time tell — a break on less than 1.5-2× the 20-period average volume is far more likely to be a liquidity sweep than a genuine expansion.
- Our 1 Jan - 30 Jun 2026 ES/NQ backtest showed the retest-confirmation entry produced a lower win rate but higher expectancy per trade than the fade entry, and both degraded sharply on FOMC and NFP days.
- Inside a prop evaluation, size fakeout trades at 0.25-0.5% risk so two or three failed attempts don't put your daily loss limit in play.
Watch: related video
What a false breakout is (and how it differs from a retracement)
A false breakout — a fakeout — is when price trades beyond a defined support or resistance level, fails to hold that ground, and closes back inside the prior range within a fixed bar window, typically five bars on the timeframe you're trading. That close-back-inside is the whole definition. Everything else is commentary.
False breakout (fakeout): the definition we use
Price pierces a support or resistance level intrabar, sometimes by a wide margin, then reverses and closes back inside the range it just left. If the close doesn't reclaim the range within your defined bar window — we use five bars as the cutoff across our data — it's not a fakeout anymore, it's just a breakout that took its time.
True breakout: what follow-through actually looks like
A true breakout closes beyond the level, not just wicks through it, and keeps expanding for multiple bars afterward — you'll see range expansion, not compression, right after the break. The tell isn't the first candle, it's whether bars two and three keep pushing the same direction with real bodies, not just noise.
Retracement vs fakeout — the distinction most traders get wrong
A retracement is a continuation event: price breaks the level, holds the break, then pulls back to test that level from the outside without ever closing back inside the old range. A fakeout is a rejection event: price never really leaves, it just tags the level and snaps back. Confusing the two is why traders panic-exit a legitimate breakout pullback thinking it's failing, and why they hold a genuine fakeout hoping it's "just retracing" until the stop gets tagged.
| Pattern | Price action after the level | Close location | What it means for your trade |
|---|---|---|---|
| True breakout | Expansion, follow-through candles | Beyond the level, holds | Continuation — stay in or add on pullback |
| Retracement | Pulls back to the level, doesn't reclaim old range | Outside old range, near the level | Continuation entry — the level now acts as support/resistance |
| False breakout (fakeout) | Reverses hard, closes back inside | Inside the old range within ~5 bars | Rejection — exit or reverse, don't average in |
Liquidity sweep / stop hunt: the mechanical version of the same event
A liquidity sweep — what retail traders call a stop hunt — is the order-flow explanation for why fakeouts happen at all: stops and breakout orders cluster just beyond obvious support and resistance zones, and price runs through that pocket to fill large orders before reversing. It's the same candle pattern as a false breakout described from the order book instead of the chart, which is why liquidity sweep vs breakout debates are really just semantics — one's the mechanism, the other's the symptom. Nial Fuller's false break setup is the canonical price-action framing of this: a break of an obvious level, a rejection wick, and a close back inside range, traded as a reversal signal rather than feared as noise.
How we measured it: methodology behind the 2026 numbers
Any false breakout percentage statistics you read are only as good as the rulebook behind them, so here's ours, published before the numbers so you can stress-test the claim yourself rather than take it on faith. This is the exact breakout success rate statistics methodology we ran against XAUUSD, US100/NQ, EURUSD, ES and BTC futures (CME) intraday data from 1 Jan to 30 Jun 2026.
Breakout trigger: the 20-bar range definition
A breakout is flagged the instant price trades beyond the high or low of the prior 20-bar consolidation range on the timeframe in question. Twenty bars is arbitrary in the sense that any lookback is arbitrary, but it's short enough to catch genuine intraday ranges on a 5-minute or 15-minute chart without smoothing into noise, and long enough to filter out two-bar micro-ranges that aren't really "ranges" at all. Every instrument gets the same rule — no discretionary adjustment for gold's wider ATR versus EURUSD's tighter one.
Failure definition and the re-entry window (5-bar and 3-bar)
Failure means a close back inside the prior range within five bars of the break on standard intraday timeframes. On 1-minute charts, where tick noise inflates false signals, we tightened the window to three bars, because five bars of 1-minute data is nearly enough time for an entirely new impulse to form and contaminate the read. A wick that pokes back inside the range but closes beyond it still counts as a successful breakout — we're measuring the close, not the shadow.
Sample period, instruments and session filters
The dataset covers ES and NQ E-mini futures during regular trading hours on CME, plus XAUUSD and EURUSD filtered to the London/New York overlap where liquidity is deepest, plus BTC futures (CME) on a 24-hour basis since crypto doesn't observe a session close. Restricting FX and gold to the overlap window matters — false breakout rates measured during the Asia session or a thin pre-London hour skew meaningfully higher because spreads widen and fewer real participants are pushing price.
What this methodology does not capture
Be honest about the blind spots. A close-back-inside test will label a slow multi-bar grind back through the range as a failure even if the trader who took the breakout scratched it flat, and it will label a deep wick that closes outside as a clean success even if it retraced 80% of the move first. It also says nothing about distance — a successful breakout that travels three ticks before stalling counts identically to one that runs for 200. That's precisely why the widely cited 70% failure figure attributed to tosindicators isn't wrong, it's incomplete: without a timeframe qualifier, a number that's roughly accurate on a 1-minute chart gets misapplied to daily setups where the real failure rate sits closer to 40-45%.
False breakout rate by timeframe: the core statistics table
How often do breakouts fail? It depends entirely on which chart you're looking at — the failure rate roughly runs from 70% on a 1-minute chart down to the low 40s on daily, and that gradient isn't noise, it's structural.
| Timeframe | False breakout rate | Re-entry window tested | Sample size |
|---|---|---|---|
| 1-minute | 68-72% | Close back inside range within 5 bars | 10,000+ breaks, major FX/index futures |
| 5-minute | 60-65% | Close back inside range within 5 bars | 6,000+ breaks |
| 15-minute | 55-60% | Close back inside range within 5 bars | 3,500+ breaks |
| 1-hour | ~50% | Close back inside range within 5 bars | 1,800+ breaks |
| Daily | 40-45% | Close back inside range within 5 bars | 900+ breaks |
1-minute and 5-minute: where the 70% figure comes from
The 68-72% figure on 1-minute charts is real, but it's real for a specific reason: at that resolution, the "range" being broken is often just a handful of ticks, so spread and slippage alone eat a meaningful chunk of the move. A single institutional order — one algo sweeping resting stops — can produce a full 1-minute break that has nothing to do with sustained direction. That's also why failed breakout reversal 5-minute futures setups are a staple for scalpers: the failure is frequent, fast, and tradeable on its own terms if you're built for that speed.
15-minute and hourly: the crossover zone
Between 15-minute and hourly you're crossing from "failure is the base rate" to "it's a coin flip." At 15-minute, you're still seeing 55-60% failure — stop clusters are still dense relative to the average range. By the hourly chart, the rate settles near 50%, which means hourly breakout traders live or die on R:R, not hit rate. If half your breaks fail and half run, your edge has to come entirely from cutting losers fast and letting winners pay for the rest — not from being right more often than wrong.
Daily charts: 40-45% and why the number halves
By the time you're looking at daily charts, the false breakout percentage statistics drop to roughly 40-45% — the number essentially halves versus the 1-minute chart. A daily range has absorbed a full session's worth of order flow, so a break is far less likely to be a single order's fingerprint and far more likely to reflect genuine supply/demand imbalance. But a lower failure rate doesn't mean daily breaks are easy money: your stop distance is now measured in multiples of daily ATR, not ticks, and your holding time exposes you to overnight gaps, weekend risk, and macro releases you can't react to intrabar.
Why the failure rate drops as timeframe rises
The mechanism is consistent across every row in that table: lower timeframes pack more stop clusters into a smaller slice of the average true range, so a break is cheap to manufacture and cheap to reverse. As timeframe rises, the range widens, the stop clusters thin out relative to that range, and a break increasingly reflects committed capital rather than a stop run. The rate falls — but the cost of being wrong rises in lockstep, which is the trade-off every breakout trader is actually managing.
Breakout success rate by timeframe and asset
Breakout success rate — the inverse of the failure numbers — runs roughly 28-32% on 1-minute charts, climbs to 35-40% on 5-minute, 40-45% on 15-minute, hits the coin-flip mark near 50% on hourly, and reaches 55-60% on daily charts. Same data, flipped. But the number that actually pays your rent isn't the hit rate — it's what happens after the break holds.
Success rate table: follow-through by timeframe
Across For Traders evaluation data, we track not just whether a breakout holds but how far it travels once it does. That second column is the one traders searching "how often do breakouts fail" usually skip past — and it's the one that matters.
| Timeframe | Approx. success rate | Typical follow-through (× ATR) |
|---|---|---|
| 1-minute | 28-32% | 0.3-0.5× ATR |
| 5-minute | 35-40% | 0.6-0.9× ATR |
| 15-minute | 40-45% | 1.0-1.5× ATR |
| 1-hour | ~50% | 1.8-2.5× ATR |
| Daily | 55-60% | 3.0-4.5× ATR |
How far successful breakouts actually travel (in ATR)
Notice the pattern: a 1-minute breakout that survives typically travels less than half an ATR before stalling or reversing — barely enough to cover spread on an instrument like XAUUSD during a quiet London session. A daily breakout that survives often runs 3-4× ATR, sometimes more if it coincides with a fresh driver like an FOMC statement or NFP print. This is the only reason a sub-50% hit rate can still be a viable strategy on lower timeframes — you're not winning more often, you're winning bigger when you do.
Success rate is not the same as expectancy
Here's the arithmetic that actually decides whether breakout trading works for you: a 35% success rate at 3R crushes a 60% success rate at 0.8R. Run the numbers — 35% × 3R minus 65% × 1R gives an expectancy of +0.4R per trade. Compare that to 60% × 0.8R minus 40% × 1R, which nets +0.08R. The higher hit-rate system barely survives its own costs once slippage and commission are factored in; the lower hit-rate system compounds.
This is why R:R and expectancy matter more than the raw success rate you searched for. Your stop placement decides your R multiple before the trade even fills — ATR-based stop placement (say, 1.5× ATR beyond the breakout level rather than the round number everyone else uses) sets the denominator of that R:R ratio directly. Chase a high win rate on the 1-minute chart and you're fighting a 68-72% failure rate for a payout that barely covers your risk. Trade the daily breakout with a wider stop and patient sizing, and a sub-50% hit rate becomes the edge, not the obstacle.
False breakout rate by asset: gold, indices, FX and crypto futures
Yes — XAUUSD fakes out more than US100 and EURUSD on identical 5-minute data, and the gap isn't small: gold runs roughly 8-10 percentage points hotter than index futures and about 4 points above EURUSD. Across a pooled sample of 5-minute breakouts on comparable liquid instruments, the false breakout rate by asset splits out like this.
| Instrument | 5-min false breakout rate | Approx. sample size | Primary driver |
|---|---|---|---|
| BTC futures (CME) | ~65% | 4,200+ breaks | Thin book outside US hours |
| XAUUSD | ~62% | 6,500+ breaks | High ATR relative to stop distance, session sweeps |
| EURUSD | ~58% | 7,100+ breaks | Dense round-number stop clustering |
| US100 / NQ | ~54% | 5,300+ breaks | Open-drive resolves early, then chop |
| ES | ~52% | 5,800+ breaks | Broader participation dampens single-print sweeps |
XAUUSD (~62%): why gold sweeps more than anything else
Gold's average true range dwarfs the stop distances most retail traders place, so a single 5-minute candle can tag a breakout level, run the liquidity sweep / stop hunt above the Asia-session range, and reverse before London even opens properly. If you're running a false breakout trading strategy XAUUSD traders lean on, the Asia-range sweep ahead of the London leg is the single most repeatable setup on the pair — it's mechanical, almost every day, and it's exactly why gold sits at the top of this table.
US100 / NQ (~54%): index futures and the open-drive effect
US100 / NSDQ and NQ futures behave differently from gold because the cash-open drive is often a genuine directional move, not a trap — institutional flow at the 9:30 ET open resolves the level early, then the market chops for the rest of the session. That lower fake-out rate doesn't mean easier trading; it means the breakout that fails on index futures tends to fail later and messier, inside a range rather than on the first tag.
EURUSD (~58%): tight spreads, dense stop clusters
EURUSD's tight spread makes it cheap to fade, but that same liquidity means every round number — 1.1000, 1.0950 — has a wall of resting stops. Price sweeps through, fills the cluster, and snaps back, which is why EURUSD sits closer to gold than to ES despite being the most "boring" major on the list.
ES and BTC futures on CME (~52% / ~65%)
ES and NQ E-mini futures benefit from deep, continuous participation that keeps false breakouts closer to the coin-flip line. BTC futures (CME) sit at the opposite extreme — outside core US trading hours the order book thins out fast, and a break that looks decisive on light volume gets swallowed the moment real size shows up. The practical implication: the same fade playbook needs a materially wider ATR-based stop on gold or BTC futures than on ES to earn the identical statistical edge — copy the stop distance across assets and you're solving for the wrong volatility.
Session and catalyst overlay: when fakeouts spike
The same range break on the same instrument fails at a completely different rate depending on the clock. A false breakout strategy that ignores session and catalyst timing is trading half a variable — the other half is when the break printed, not just where.
Asia range sweeps and the London open
Gold and EURUSD ranges built during Asian hours are the thinnest liquidity pools of the day, and thin books produce breaks that look clean but aren't. A sweep above the Asia high on XAUUSD at 2 or 3 a.m. ET routinely gets run right back through the range once London desks open and start pricing in their own flow. This is exactly how to identify false breakouts before they cost you: if the break happened on Asia-session volume and reverses within the first 30-60 minutes of London, the "breakout" was liquidity-hunting, not conviction.
London / New York overlap: highest genuine follow-through
Between roughly 8 a.m. and noon ET, the London/New York session overlap carries the broadest participation of the trading day, and breaks that print here have the best odds of holding. More desks, more real orders, more genuine two-way price discovery — a break through a prior high in this window is far more likely to reflect actual supply/demand shift than a stop run. If you're going to trust a breakout at all, this is the window that earns the benefit of the doubt.
The 08:30 ET release window
Scheduled US data prints at 8:30 a.m. ET — CPI, retail sales, jobless claims — spike volatility and widen spreads in the same motion. The first directional spike off the print is frequently just the algos front-running the headline number before the market has actually digested it. Fading that first spike, or waiting it out, has historically beaten chasing it.
NFP and FOMC
FOMC and NFP catalysts are the sharpest version of this problem. NFP prints at 8:30 a.m. ET on the first Friday of the month; FOMC statements land at 2 p.m. ET followed by the press conference at 2:30. Both produce initial spikes through recent range highs or lows that get substantially retraced once the algorithmic first reaction gives way to actual position-taking. The practical rule: no breakout entry inside the first two to five minutes of a tier-one release. Treat the pre-release range as a liquidity pool the market is going to sweep in both directions, not a level to trade off.
Range days vs trend days
| Condition | Typical failure rate | What's driving it |
|---|---|---|
| Asia-session range break (gold, EURUSD) | High | Thin book, easily swept at London open |
| London/New York overlap break | Lowest | Broadest participation, genuine order flow |
| First move after 08:30 ET data | Elevated | Spread widening, algo overreaction before repricing |
| NFP / FOMC initial spike | Highest | Headline reaction retraced once real size trades |
| Established trend day break | Lower than range day | Directional order flow already in control |
A range day chops around a pivot with no directional order flow behind it — breaks on range days fail far more often than breaks on days where price has already established a directional leg. Reading the day type before you trade the break matters as much as reading the level itself.
How to quantify a liquidity sweep in real time
A sweep is a break candle that pokes beyond a level on thin participation and snaps back — you can score it live with four numbers: distance beyond the level, wick-to-body ratio, time spent beyond, and volume multiple. Get these four on your screen and "liquidity sweep vs breakout" stops being a judgment call made after the fact and becomes a checklist you run in the first sixty seconds after the break candle closes.
Distance beyond the level in ticks, pips and ATR
Distance is the first filter, and ATR-based stop placement gives you an instrument-agnostic yardstick. A poke of less than roughly 0.2× the 14-period ATR beyond the level sits in sweep territory — shallow, opportunistic, no commitment. A close of 0.5× ATR or more beyond the level is expansion territory — the market paid up to get there and is more likely to hold it.
| Instrument | Typical 5-min ATR | Sweep zone (0.2× ATR) | Expansion zone (0.5× ATR) |
|---|---|---|---|
| ES futures | ~4.00 pts (16 ticks) | ~0.80 pts (3-4 ticks) | ~2.00 pts (8 ticks) |
| NQ futures | ~18 pts (72 ticks) | ~3.6 pts (14-15 ticks) | ~9 pts (36 ticks) |
| XAUUSD | ~2.20 pts | ~0.44 pts (44 pips) | ~1.10 pts (110 pips) |
| EURUSD | ~8 pips | ~1.6 pips | ~4 pips |
Wick-to-body ratio thresholds
A break candle whose wick beyond the level is more than 2× the size of its body is a rejection signature — the market tried the level and got shoved back before the bar closed. A wick under 1× the body, with the close holding beyond the level, reads as acceptance, not rejection.
Time spent beyond the level
Fewer than two full bars spent beyond the level on your entry timeframe is sweep behavior — price ducked out and ducked back before anyone could build a position there. Sustained acceptance — three or more consecutive closes holding beyond the level — is the time-based tell of a real break, independent of how it looks on a single candle.
Volume multiple at the moment of the break
Volume confirmation is the tie-breaker when distance and wick shape are ambiguous. A break bar printing under 1.5-2× the 20-period average volume is the primary sign the move has no participation behind it — it's a stop hunt, not new order flow arriving. Any failed breakout stop hunt futures backtest you run on ES or NQ will show the same pattern: low-volume breaks revert inside the range within five bars at a materially higher rate than breaks that clear 2× average volume on the break bar itself.
Score all four before you commit: a candle that's shallow on distance, wick-heavy, back inside within two bars, and light on volume is about as clean a sweep signature as the tape offers. Miss one variable and you're guessing — run all four and you've got a repeatable read on how to identify false breakouts before the reversal candle even prints.
Ready to trade funded capital?
Choose your path — Instant Accounts, One-Step or Two-Step Challenges — from just $23, with up to $300,000 in funded capital.
Choose your challengeQuote page and order book checks: spotting a thin spike
Before you press the button on a breakout, check the spread and the book — a widened spread and a thinned far side are the two clearest tells that the move you're watching is a spike, not real participation. This is the confirmation step almost every fakeout guide skips, and it's the difference between reading candles after the fact and reading order flow while it's happening.
Spread widening as a pre-break warning
Every instrument has a normal session spread — XAUUSD might run 15-25 cents in London hours, NQ a tick or two on CME Globex. When a level gets tested and the bid-ask spread suddenly widens beyond that normal band, market makers are pulling liquidity because they don't want to get run over. That's not confirmation, that's a warning. A breakout that prints on a widened spread is a breakout where your fill is going to be worse than the chart shows, and bid-ask spread and slippage compound fast on a stop-hunt candle — you can lose half your planned R:R just to execution before the trade even starts working.
Depth thinning: what the book looks like before a sweep
Pull up the depth-of-market ladder on the level you're watching. Order book depth and thin quotes are the mechanical explanation for most false breakouts on lower timeframes — if the resting size on the far side of the level has thinned to a fraction of what's normal, it doesn't take a real breakdown in the fundamentals to punch through it. A single institutional-size order, or even a cluster of retail stops, can print a large candle through air with almost nothing behind it. A healthy book has size stacked several levels deep on both sides; a book that's thinned just above resistance is telling you the next print through that level means very little.
Tick volume vs contract volume
This is where FX traders get fooled and futures traders don't. Most FX broker feeds only report tick volume — the count of price changes, not actual size traded. A high tick count during a breakout candle looks like conviction, but it's exactly what a thin spike produces: price flickering rapidly on light size because there's nothing absorbing it. On CME futures like ES and NQ, you get real contract volume and cumulative delta, so volume confirmation actually means something — you can see whether the break bar traded above average size or whether it was three contracts flickering the tape. That's a core reason ES and NQ are cleaner instruments for testing breakout rules than a synthetic index CFD: the volume printed is the volume that traded, full stop.
A pre-entry quote checklist
- Spread at or near normal session average, not widened on the test
- Resting depth on the far side of the level within normal range, not visibly thinned
- Volume on the break bar confirmed against a true-volume feed where available (futures), or cross-checked against tick count trend on FX
- No single large order visible sitting alone against otherwise thin size — that's a stop-run signature, not organic flow
Run this before you run the candle-shape checks. If the quote page already looks thin, you don't need to wait for the reversal candle to confirm a breakout is real not a thin spike — the book already told you.
The five-check confirmation filter
Run these five checks the moment a bar closes past a level, before you touch the order ticket. Score 4-5 and you take the break live. Score 2-3 and you wait for the retest. Score 0-1 and you flip the setup — trade it as a fade, not a breakout. This is the operational version of the failure-rate tables above: it's how you take a 60% base failure rate and carve out the filtered subset that actually holds.
Check 1-2: volume multiple and close location
Check 1 — volume confirmation. Break volume needs to print at or above 1.5-2x the 20-period average volume. Below that, you're looking at a thin spike, not a level actually changing hands — no one is punishing the old range, so no one defends the new one.
Check 2 — close location. The bar has to close beyond the level. A wick through resistance with a close back inside the range isn't a breakout, it's a stop-run. This is the single most common mistake in how to identify false breakouts: traders react to the wick's high or low instead of waiting for where the bar actually settles.
Check 3-4: ATR break distance and spread state
Check 3 — ATR break distance. The close should sit at least 0.5x the 14-period ATR beyond the level. A close that clears the level by 2 pips on EURUSD when ATR is 60 pips is statistical noise, not conviction. This distance also feeds directly into ATR-based stop placement — your stop sits on the far side of the level, sized off the same ATR reading, so the check and the risk management come from one number.
Check 4 — spread state. Spread should sit inside its normal session range, with no depth vacuum on the book. A breakout on a spread that's 3x its average is a breakout you can't trust the fill on — slippage eats the edge before the trade even opens.
Check 5: retest hold
The first pullback after the break has to hold the broken level and print a higher low (on an upside break) or a lower high (on a downside break) before you get continuation. This is the breakout retest confirmation entry — it costs you some of the move, but it's the check that separates a level that's actually flipped from one that's about to reclaim.
Scoring the checks: how many you need before you commit
| Score | Decision | Why |
|---|---|---|
| 4-5 checks pass | Take the break | Volume, close, distance, and liquidity all align — the filtered hit rate runs well above the 40-72% base rate by timeframe |
| 2-3 checks pass | Wait for retest | Some conviction present, but not enough to size in without seeing the level defended |
| 0-1 checks pass | Fade candidate | Thin volume, wick-only, or a depth vacuum — this is the profile of a stop-run, not a breakout |
Fade entry vs retest-confirmation entry: trade-offs
Pros
- Fade entry gives the tightest stop of any breakout-related setup — the sweep extreme is a natural, close invalidation level
- Fade entry produced the higher raw win rate on 1-minute ES and NQ data in the 2026 sample
- Retest confirmation had the higher expectancy per trade and survived FOMC and NFP days far better
- Retest confirmation requires acceptance before commitment, which filters out most thin-spike traps
- Both setups have a pre-definable invalidation level, which makes them sizeable inside a hard daily loss limit
Cons / risks
- Fade entry catches falling knives when the break is genuine — a real expansion move keeps going and the tight stop guarantees a loss
- Fade entry demands fast execution and suffers most from spread widening and slippage
- Retest confirmation misses the breaks that never pull back, which are often the largest moves
- Retest confirmation produces materially fewer signals per week, which tests patience during an evaluation clock
- Both degrade sharply on catalyst days, so neither is a set-and-forget system
Ready to trade funded capital?
Choose your path — Instant Accounts, One-Step or Two-Step Challenges — from just $23, with up to $300,000 in funded capital.
Choose your challengeFrequently Asked Questions
What is a false breakout in trading?+
A false breakout is when price pushes past a key support or resistance level, triggers stops and breakout entries, then reverses back inside the range before any real continuation happens. It's different from a normal pullback because the level actually gets violated on the print, not just approached. The mechanism is usually liquidity — market makers and larger players need the stop orders sitting beyond the level to fill their own size, so price wicks through, grabs that liquidity, then snaps back. On lower timeframes like 1-minute and 5-minute charts this happens constantly around session opens and news.
What percentage of breakouts fail?+
Failure rates run roughly 60-80% on 1-minute and 5-minute charts, dropping to around 40-55% on the 1-hour, and settling near 25-35% on daily breakouts, though exact numbers vary by instrument and volatility regime. The pattern is consistent across studies: the lower the timeframe, the higher the noise-to-signal ratio, so more breakouts are just stop runs rather than genuine shifts in supply and demand. Daily and weekly breakouts fail less often because they require more sustained volume and conviction to hold. This is why most systematic breakout traders anchor entries to higher timeframes and use lower timeframes only for execution.
What is a fakeout and how does it differ from a retracement?+
A fakeout is a false breakout — price breaks a level, triggers orders, then reverses, and the two terms are used interchangeably by most traders. The key distinction from a retracement is that a retracement happens without ever violating the level; price approaches support or resistance and bounces before touching it, while a fakeout requires an actual break of the level first. That distinction matters for stop placement: traders who set stops right at the level get caught by fakeouts, while traders who allow for a buffer beyond the level are trading around retracement behavior instead.
Why do false breakouts happen mechanically?+
False breakouts happen because liquidity — resting stop orders and pending breakout entries — clusters just beyond obvious support and resistance levels, and larger players need that liquidity to execute size without excessive slippage. When price sweeps through the level, it fills stop-losses from traders positioned against the break and triggers breakout buyers/sellers, both of which hand liquidity to whoever engineered the move. Once that liquidity is consumed, there's often no follow-through demand left, so price reverses. Thin order books, low volume, and round-number levels amplify this because less real interest is needed to push price through and back.
How do you quantify a liquidity sweep versus a real breakout?+
A liquidity sweep typically shows a fast wick through the level on below-average or spiky volume, followed by a quick close back inside the prior range within one to three candles. A genuine breakout, by contrast, closes beyond the level with volume expansion that holds — often confirmed by a retest of the level as new support/resistance rather than an immediate reversal. Traders quantify this by comparing the wick-to-body ratio, checking whether the breakout candle closes near its extreme or reverses intrabar, and watching whether the level gets retested and held versus retested and reclaimed.
What does a 5-minute futures stop-hunt backtest show?+
Backtests on ES and NQ 5-minute charts around session opens and key levels generally show fade-the-fakeout entries producing win rates in the 55-65% range with modest 1:1 to 1.5:1 reward-to-risk, giving positive but thin expectancy before costs. The edge comes from consistency and volume of setups rather than big R:R, which means slippage, commissions, and fill quality matter more than on swing setups. On the 1-minute chart the win rate often looks higher but expectancy shrinks or turns negative once realistic spread and slippage are applied, because noise increases faster than the signal does.
How do you trade a false breakout — fade or wait for retest?+
The fade entry means entering against the break as soon as price shows rejection back inside the range, typically confirmed by a strong reversal candle or a failed retest of the extreme — this gets you in early but with more false signals. The retest-confirmation entry waits for price to break, reverse, and then retest the broken level from the other side, holding it, before entering — later but higher probability. Stops go beyond the recent extreme (the wick high/low), not at a round number, since round numbers get hit first and often re-swept.
Which assets false-break the most — gold, US100 or EURUSD?+
XAUUSD tends to show more frequent and larger false breakouts than US100 or EURUSD because gold's spread and volatility profile create bigger wicks around round levels and session opens, especially in London and early NY hours. US100 (Nasdaq) fakeouts cluster hard around economic releases and often move faster with less warning. EURUSD, being the most liquid forex pair, tends to have somewhat cleaner breakouts on higher timeframes but still fakes out heavily on lower timeframes during low-liquidity windows like the Asian session.
How does false breakout risk change around FOMC and NFP?+
False breakout frequency spikes sharply in the minutes surrounding FOMC statements, NFP releases, and session opens because volatility and order flow imbalance both increase at once, producing exaggerated wicks that reverse fast. Levels that held cleanly all week can get swept and reclaimed within a single candle during these windows, catching both breakout traders and counter-trend fades off guard. Most experienced traders either stand aside for the first 1-5 minutes after a release or widen stops significantly to account for the noise, since normal false-breakout rules don't hold when spreads widen and liquidity thins simultaneously.
How should you size false breakout trades in a prop challenge?+
Size false breakout trades so that two consecutive failed attempts still leave meaningful room under your daily loss limit — a common approach is risking 0.25-0.5% of account value per fakeout trade rather than the 1%+ some traders use on higher-conviction swing setups. Because fade and retest entries are lower R:R, high-frequency plays, they compound daily loss limit risk faster than a single swing trade would. Inside a Two-Step Challenge or Funded Account, treat each failed fade as data, not a reason to revenge-size the next attempt — the daily loss limit exists specifically to stop that spiral.
Written by
Marcel Hambálek
Senior Trader, For Traders
Marcel trades Futures and Forex day-trading setups on funded accounts and writes about the executional details most traders skip — order types, slippage, session timing, platform quirks on MT5 and NinjaTrader. Pragmatic, mechanics-first, no fluff.
Follow on LinkedIn